Pages

Thursday, February 5, 2015

Our Basement Bathroom Paint Colors... {Bath Addition}

So I darned my paint clothes, and yes, I even have paint socks.


Because it's time to paint that glorious bathroom bath, which means the end of this bathroom addition is in sight, hooray!


Here's the plan: we're using Kilz Clean Start as our primer. It provides easy water clean up, stainblocking, and a mildew resistant finish (all those nice words you like to hear when you're priming a bathroom). This Kilz primer was really great because it has very little odor, no VOCs, and it dried in a 1/2 hour. We put two coats up yesterday, and the bathroom walls and ceiling are well covered.


I should insert here that although those "afters" looks pretty great, the "befores" are just as good. They are evidence of a well done taping and mudding job by my handyman dad. I'm surrounded by amazing handymen, and it's heaven. He completed this step over the weekend, and we are deeply grateful. As you can see there are many corners and edges in this small space, see where the ceiling raises up above the shower and vanity? So it was ideal that we had an expert come in and help us out.


For our paint colors (which I hope to get to today!), I decided to go with with Behr's Fresh Popcorn (left) on the walls and ceiling. This white will keep things light and bright. But I still wanted to go with some drama and interest, so I picked up a quart of Behr's Starless Night (right) and plan to use it on the sliver of wall where the vanity and mirror will go.


I'm excited to do the accent wall. Although, I've been humming and hawing over whether I should paint the little raised ceiling above the vanity with this dark color as well. Thoughts? 

I'm hoping to have all the painting done by Saturday because Saturday is tile day. That wonderful handyman-dad is coming back to tile the bathroom floor (another hooray!), with the same porcelain tile and charcoal grout we went with in the upstairs bath since we had leftover tile. And if all goes to plan, this family of four is in great anticipation for "Toilet Tuesday," it's even on the large family calendar.

Oh, and this weekend, I'm off to a more-than-needed girls weekend away in Collingwood. Here I come hot tubs, wine, girly talk....


Tuesday, February 3, 2015

Children's Books We're Digging... {Kiddie Stuff}

It's been awhile since I bought new children's books.


Of course, library and reading books are always circulating through our home, but I hadn't bought anything new in many months that was just ours to stay. So when a brilliant friend sent me an email about this book, Rosie Revere, Engineer, I went for it. I love that this friend always recommends books that stretch our little ones minds to wonderful possibilities.

Then, while shopping on Amazon, curiosity got the best of me, and I found another book by that creative author, Andrea Beaty, called Iggy Peck, Architect. And it's been the cause of big laughs and raised eyebrows, especially when at two, Iggy builds a tower with dirty diapers and glue. The kids just can't believe it.


The writing is fun, and the illustrations are captivating, and we love that Rosie and Iggy are in the same class at school. We wonder if their friends? But anyhow, Rosie and Iggy inspire us to build, and create, and not to quit on our dreams.

And because this mama can't contain herself when it comes to great books, I splurged for this one too, What Do You Do With An Idea? 


I love how this little boy feeds his idea, defends his idea, and grows his idea.. and we're all left wondering, what's his idea? And it gives us room to dream, too.  Because I want nothing to limit these adopted little ones. We desire for them to dream big, to nurture those dreams, to trust God with those dreams, and to let nothing hold them back.


Aren't they the cutest pair? And we're proud that the oldest one is reading wonderfully, and the youngest is right on her heels (you can tell who their mama is.. one who gets excited about books and writing, and anything that stretches the mind past it's limits.. and I love that they love it too). And in case you're wondering, these three books have our little ones stamp of approval and I'm sure they'll be memorized in no time flat. Plus, they'll further inspire our fort-building, lego-loving, art-enthusiast kiddies.

In no way have I been compensated for sharing these finds with you... we just love to share what is boosting the learning and stretching in our home. And for the home decorators, isn't this what we create a cozy, charming home for? For lazy days with books on laps, big dreams, and socks half on, and we're all completely comfortable and loved for who we are in this place. 

And just one more thing, do you have a children's book or two that you're currently loving? I'd love to hear it. 


Thursday, January 29, 2015

Drywall in the Basement Bathroom... {Second Bath Reno}

We've got drywall up, and so this little space is really taking shape.


It's exciting to have the plumbing and electrical prep work finished and while it's all very tidy behind those walls, it's nice to cover it up (to state the obvious). However, before the drywall went up, we decided to go with soundproofing insulation in the walls and ceiling (Roxul Safe'n'Sound from Home Depot). We put it everywhere except for around the shower. This was an important feature for my new mom cave.. you know, when I need a soundproof break. Actually, that's a secondary reason, the first is to provide family and guests with absolutely privacy. In a small home sometimes it can feel like we're right on top of each other, so adequate soundproofing was important to block each other out a bit... said in the nicest way, of course. Here's a dark drywall tour, since there's no light source at the moment:


The vanity will be to the right of the shower, where the single dangling bulb is. And the last photo (bottom right) is where the toilet will go. The toilet being the whole reason for this bathroom renovation. 


Here's the view from the laundry / storage side. The wall protrudes into this area slightly, but there's still adequate space. Much to the handyman's surprise, I did request soundproofing and drywall on this side too (after the bathroom is complete) to keep the laundry noises at bay, and to provide a more clean looking laundry space. I'd like a wall to have a drying rack, hang an ironing board, maybe put up art, etc. Who knows, this may inspire a whole new, nicer laundry area... a girl can dream.


Outside the bathroom was also dry walled. It will be nice to have some "normal walls" in the basement given that our basement walls have mostly haphazard bead boarding and popcorn texture, it's just not pretty.

My handy-guy left a spot for a light to the left of the door. I'm thinking of going with something like this (from Living Lighting) or this (from Lowes), keeping in mind that it's near the playroom so it will need to have some sturdiness to it.


And I'm delighted to have access again to my central vacuum plug in. Luke (the handyman) moved it from where the bathroom door is now, to the adjacent wall. It's a perfect place for it because I won't have to hassle with any furniture to access it.

Here's an updated before and after, because we really like to see our progress around here. Before:


And, now:


Yes, that pole is very annoying, we just have to deal with it. But otherwise, progress is so wonderful. The mudding and taping is happening this weekend, and we plan to paint early next week (!).

For other bathroom posts check out here (pictures from way, way before), here (the shower), and here (our plans for the sink, faucet, and lighting). 


Tuesday, January 27, 2015

Quick Art for $0... {Bringing Life into Your Home}

I spend a lot of time here... and I'm keeping it real this morning:


Making breakfast, lunches for school, dinner for four, late night snacks for weary parents, entertaining family and friends, and all the clean up in between. I realize this kitchen won't make it to Pinterest (those counter tops are "yikes"). It has hardly changed since we moved in nearly five years ago. However, a kitchen renovation just isn't on the "list" right now, but hey, it serves us well. So, I decided to do something quick and easy to brighten up this heavily used space without enlisting the help of a busy handy-guy.


I've always wanted to put up Bible verses in our home. Surround ourselves with scripture, before anything else. A quick search online ("free scripture printables") brought up many options of beautifully designed scripture versus. I decided to print this (from Beautifully Rooted) and this (from The Girl Creative) for the kitchen because they're great reminders in moments of stress, like getting ready for school, preparing dinner.. you know that 4-6pm stretch can be tough.. to be kind, loving, patient, and self controlled with my children. And I love that as my kids learn to read, they'll have these daily reminders too.

We have a laser printer, so they were easy to print at home, and I found they printed best on regular paper for my intended use.


My tools were simply :

- 2 clip boards
- 2 copper nails
- Hammer
- Pencil
- Measuring tape
- Sticky tack

It's all quite self-explanatory. I held the clipboard up to the wall to see where I wanted it to go (on either side of the sink where there is a sliver of blank wall), marked it with a pencil, measured that it was centered, and hammered in a nail. Although, I didn't anticipate that the clipboard wouldn't sit flush to the wall, so I used a small ball of sticky tack to stick the bottom of the clipboard to the wall. I measured the placement of my first nail, and used those measurements for my next nail.


It's a perfect use of space for us, and I even tidied up for you.


We've been living with it for a few weeks now, and I'm still loving it. Just this morning, in a moment of frustration while I prepared a little one's lunch, I took a deep breath and reminded myself.. the fruit of the spirit is love, joy, patience, gentleness... and I was able to breathe again. I may frame these prints down the road, but for now, this little project was entirely free (yes!), and entirely life-giving. 


So, while I was building this post and linking to the sources, I couldn't resist but to print these other designs I spotted at Beautifully Rooted, this ("hope") and this ("pray more, worry less"). And I added the "hope" design on our gallery wall in the living room. A little daily inspiration with no cost.


So a big thanks to all the artists who created these designs, and let us print them for free. I'm so grateful, as I do the dishes and wipe the counter tops this morning, and thinking 'what's for dinner?'

Okay, now be honest. What are you thoughts towards that crazy kitchen backsplash? I won't be offended. 


Friday, January 23, 2015

Friday's Four Links... {because we like the good stuff}

When you need a breather, because I don't know about you, but sometimes a week is wonderfully, nearly over...

1. So I've only see the trailer, but we're looking forward to watching this Saturday night (without the kids, because their too young for such mature themes). "The Good Lie" is about "the lost boys," who were orphaned by the Civil war in Sudan that began in 1983. These young victims traveled as many as a thousand miles on foot in search of safety.. I just can't even being to imagine. Then, fifteen years later, a humanitarian effort would bring 3600 lost boys and girls to the US. Sudan, and the Lost Boys, are close to our hearts because it is a profound, deep part of our children's heritage :


2. Yes, these excuses, I can completely identify with. They keep you from moving forward, from taking a risk, pursuing a dream. And I'm stepping out into something risky, and I've got to toss these excuses to the curb... you?

3. My girl and I are listening to this song these days, "Try," by Colbie Caillat. I think we have it memorized, because we're loving the message... your beautiful just the way you are. And my heart melts, when I hear that 6-year-old girl pray and thank God that she is beautiful, not for her painted nails, or dresses, but just the way she is :


4. So my indoor plants have seen better days. We're all missing the sun around here, because we're in the heart of winter in Ontario, Canada, but I've also been slightly neglectful (overwatering or underwatering). These reminders from A Beautiful Mess, a blog I've just discovered and enjoying, are giving me inspiration to revive my sad looking plants with some TLC.


Happy nearly-the-weekend, friends!


Wednesday, January 21, 2015

Coffee Table Makeover... Because I'm Not Waiting on 'Someday' {Just 3 Steps}

We picked up this coffee table awhile ago at Yardigans (a second hand store here in London) for just $10.


I introduced it on the blog here, and confessed that I had no idea what to do with it, other than remove the ugly wood tape and give it a good wipe down. So it's migrated around the house, between the basement and living room, but always ducked under my makeover radar.

Until I read the The Nesting Place, which I wrote about here, and realized that I was waiting on 'someday.' 'Someday' when I have the time and resources to do it right.. and guess what, that day rarely shows up for this girl, you?.. so I need to just do 'something' rather than wait on 'someday.' So I took another look at that coffee table we picked up in the summer, and decided to try something out.

First, I used what I had - leftover chalkboard paint - on the two surface pieces. I did two coats in one evening (chalkboard paint covers very well), and then let them sit for a week (as instructed) before I prepped the surface with chalk.


We have play chalk on hand for the kids, so I just used a piece of white chalk from their collection. I rubbed the side of the chalk across the surface, then used a damp rag to wipe it off. I did this step twice. It was super quick.

I decided to go with a little blurb on the top piece, give thanks, which I wrote with a white chalkboard marker. On the bottom, I just went with a simple triangular design.


Next, before the handyman left on one of his many trips to the Home Depot, I asked if he could add these items to his list :


The Goo-Gone was pretty amazing. I sprayed it along the frame and then a few minutes later I wiped it down with a cloth. The frame cleaned up really well.

Lastly, I guess you could stop here if you wanted, but I decided to paint the frame with Rust-oleum's Universal Pure Gold spray paint. It only took 1 can, 2 coats. This was my first time using a metallic spray paint.. so it was really a shot in the dark.. but I like the look of it and I'm feeling gold fever (I want to spray paint everything gold).

After letting the frame dry for about 24 hours, I put it all together and set it up in our basement TV area. But first, a reminder of how the coffee table looked before this mini makeover.


And now :


I love that it's no longer giving me an evil eye.. the "do something" eye. And you know what, it was a super cheap fix. 

Coffee Table (second hand): $10
Rust-oleum's Universal Pure Gold spray paint: $10 + tax
Goo Gone Spray Gel: $5 + tax
Chalkboard paint: $0 (leftover paint)
Chalk and chalk board marker: $0 (around the house)

= ~ $28

And if you're wondering, we're using coasters as much as we can, but a simple spill (drink or food) is easy to wipe up. Do you have a little project that's just getting away from you? Who doesn't! What is it? 


Monday, January 19, 2015

A Bathroom Update... {a door, faucet, sink, and lights}

I've decided that although a bathroom is the smallest room in our home, it is the most high maintenance. The expense is high for such small square footage, and the labor is tedious. Thank goodness I married a talented handyman (with a super talented handyman dad, who is a plumber by trade).

So I'm always delighted to share progress on this big undertaking in our home. One of the latest updates on our basement bath is this: 
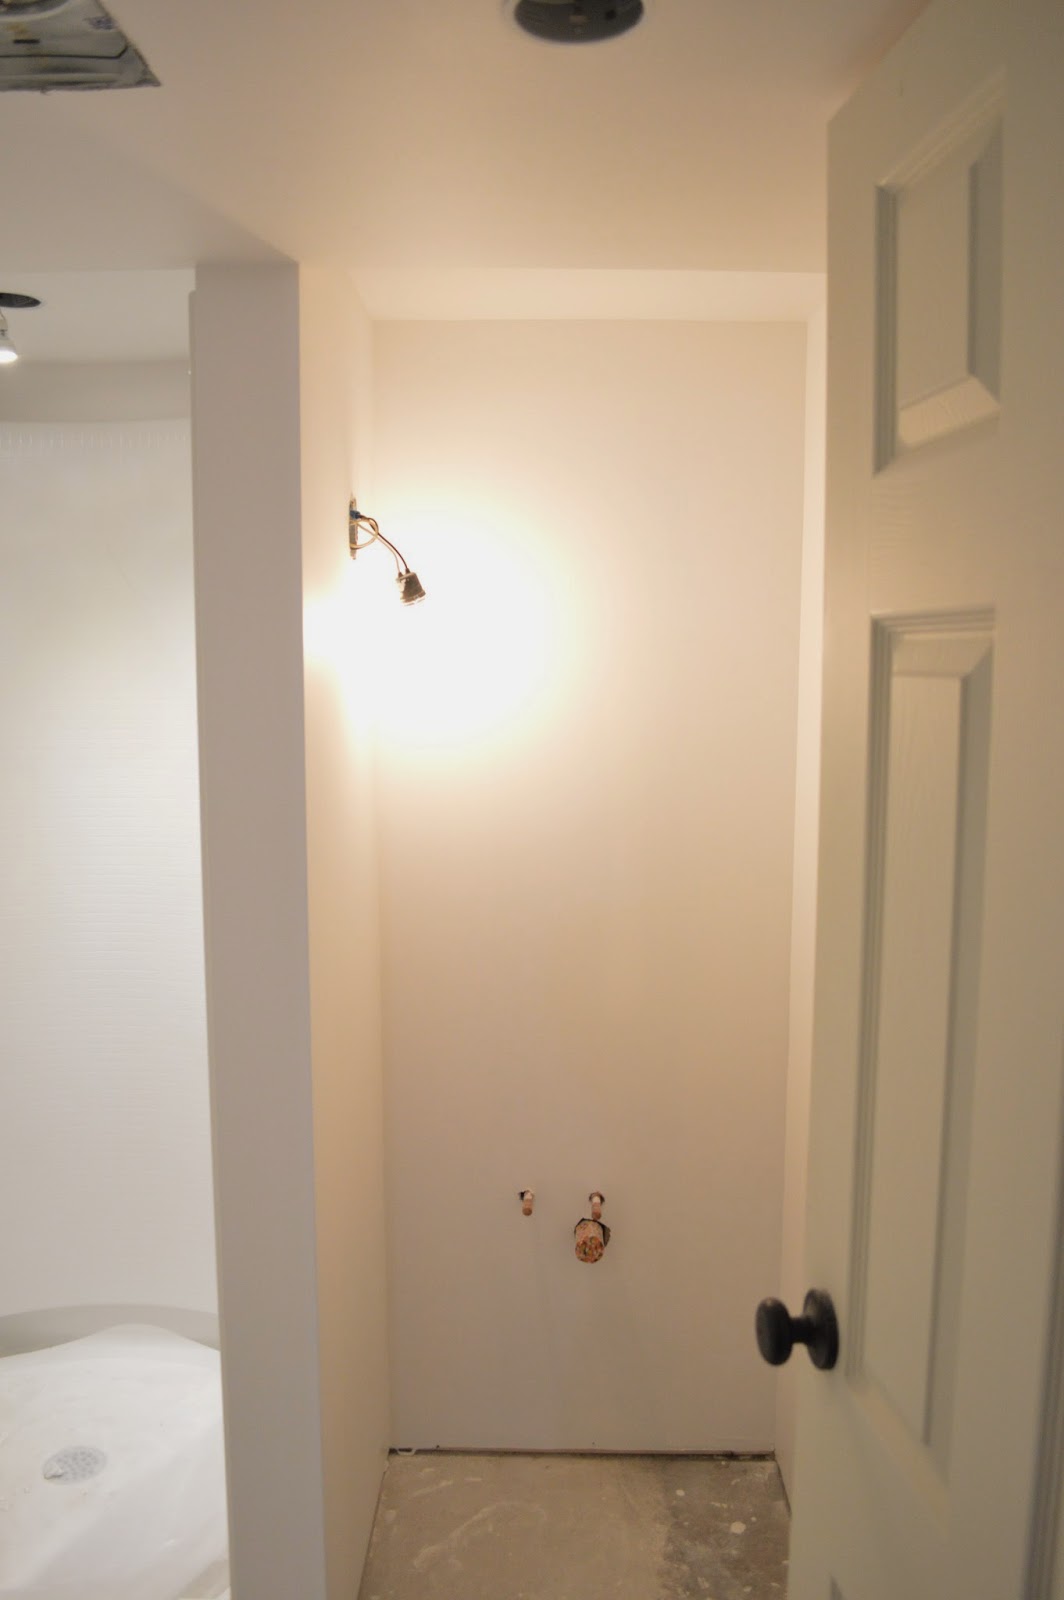
we have a door, everyone! But first, a before-the-door look.


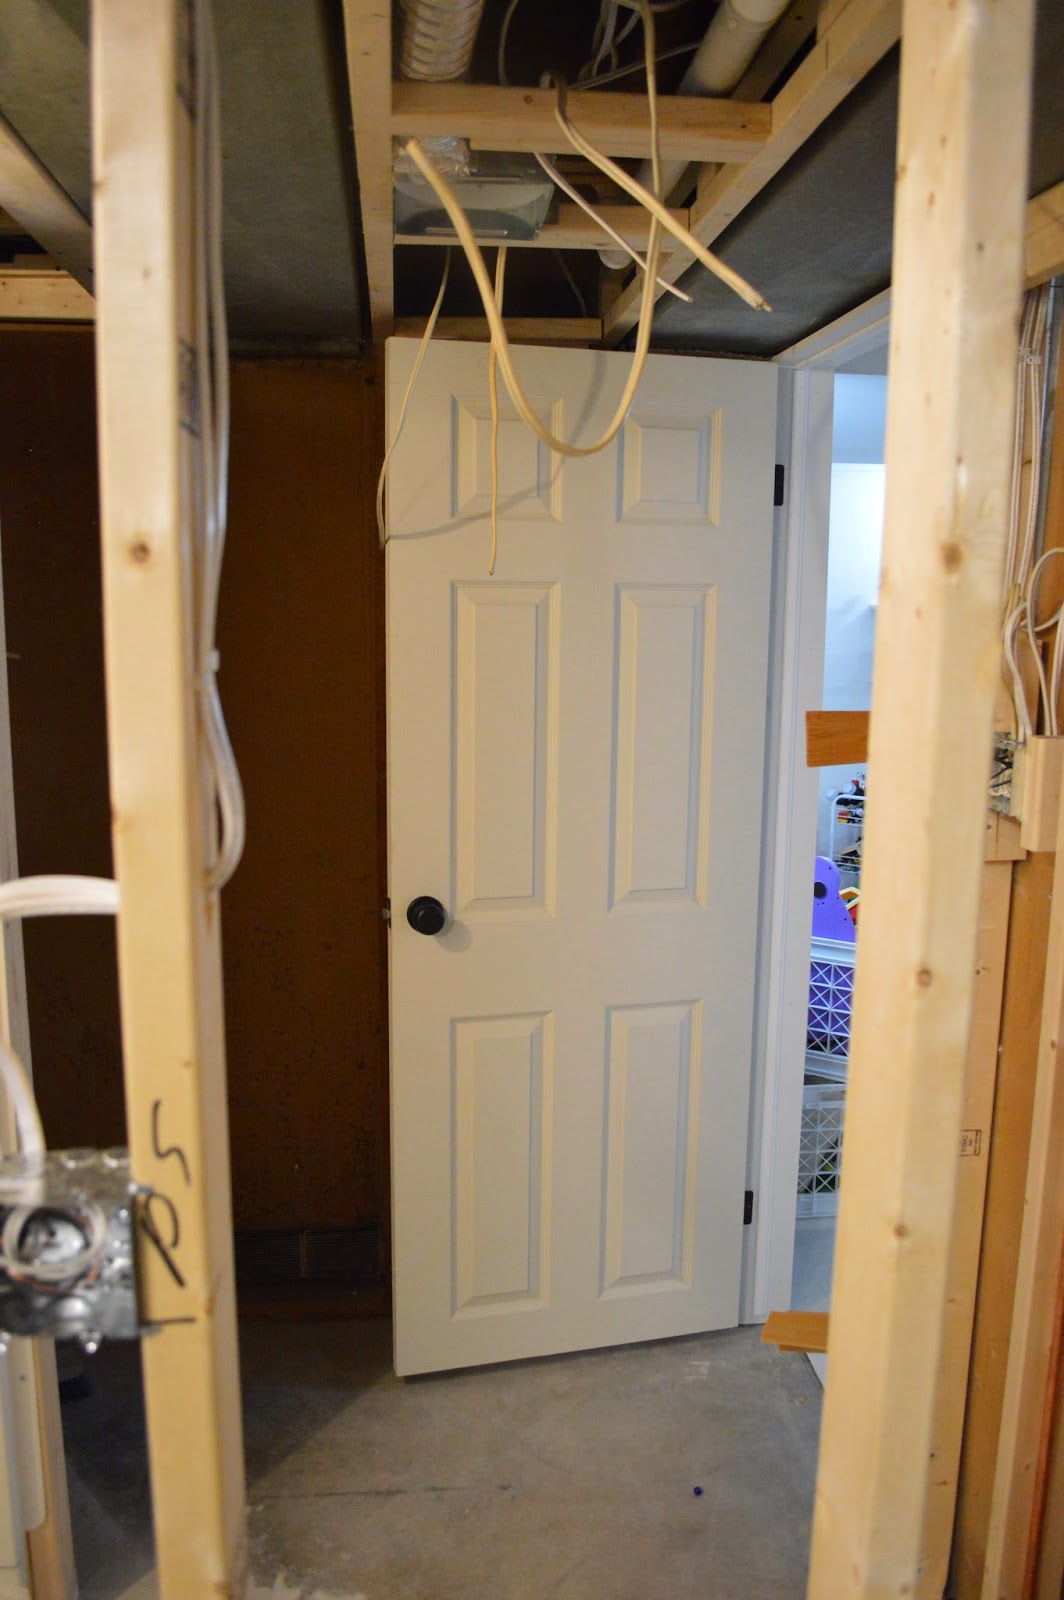
And now, with a door :


Don't mind the haphazard wall to the left of the door. We had little nephews over, and had to put up something to stop them from going into the storage / workshop area. But other than that, isn't it great?


We purchased the door, a basic six panel to match the other doors in our home (all two of them), and the door knob, hinges, frame, and door jam from 
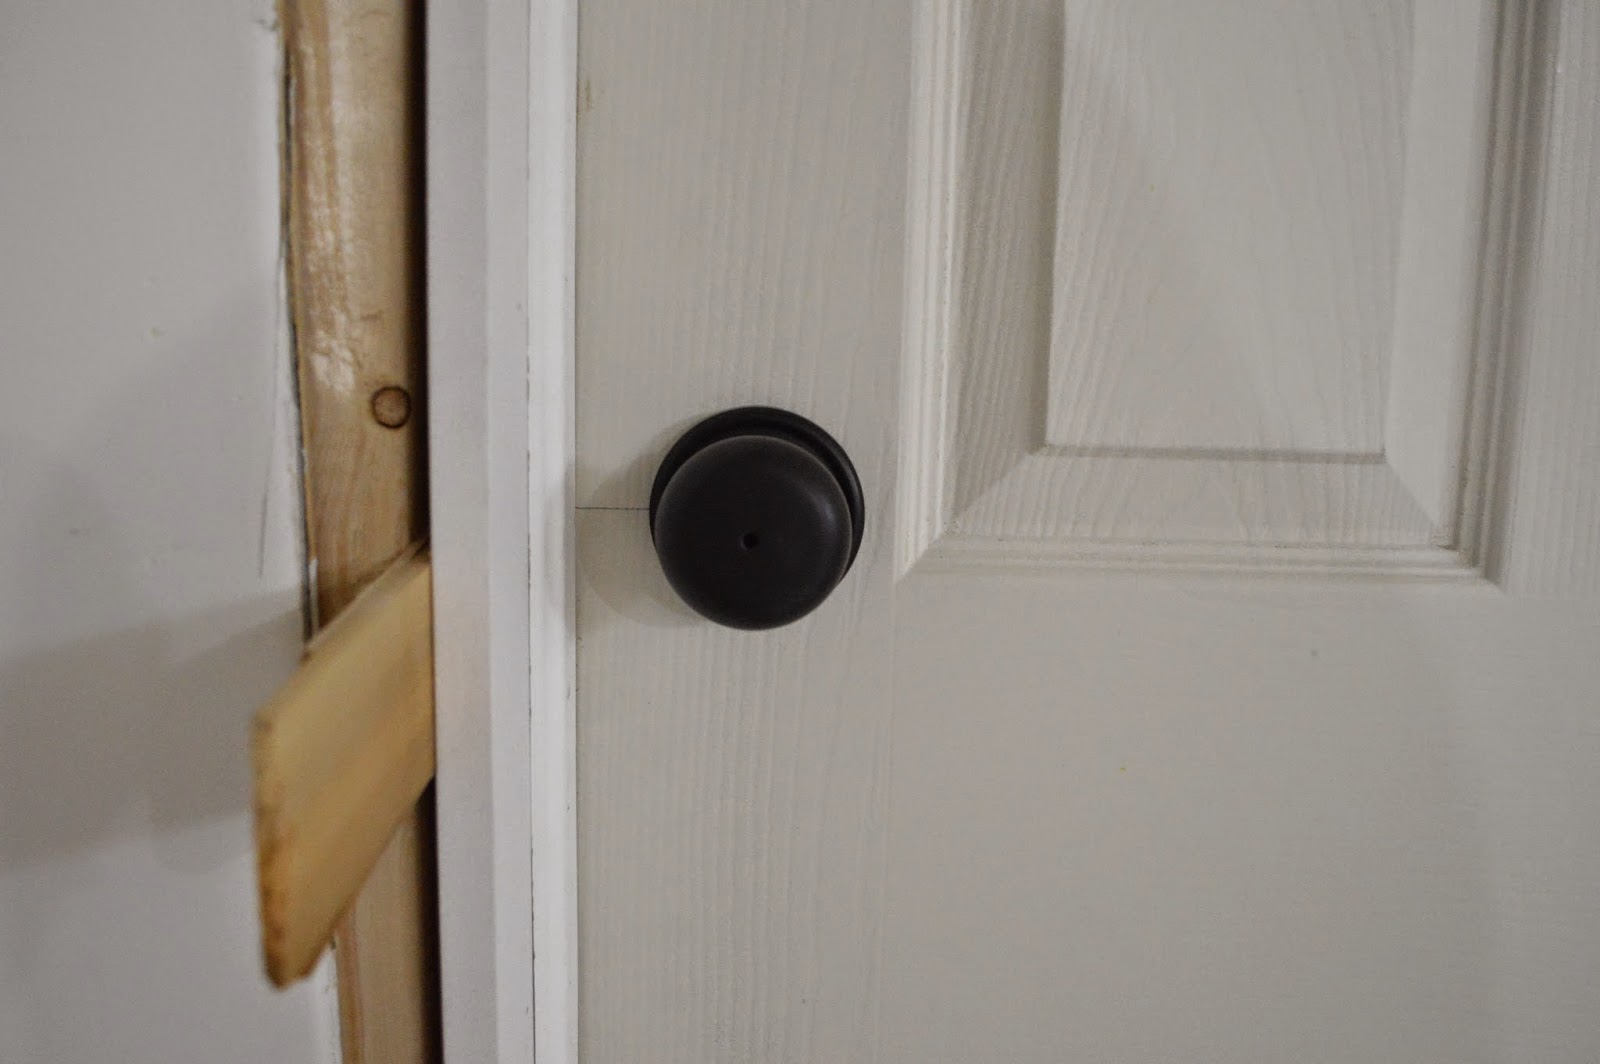
North Pole Trim & Supplies. The cost of the door and accessories were $120, which we thought was reasonable (plus, delivery was free). The door needed to be cut down to accommodate the low ceiling due to the duct work, which was done for us by North Pole. I wondered if the door may look noticeably shortened, but we were happy to see that it doesn't. We opted for black hinges and door knob. The knob is a Hancock 514 in iron black. I like the contrast of the black door knob against the white door, and the traditional knob fits our home's aesthetic.


Installing a door is very exciting because it makes this a room now. It makes the basement seem more spacious too, given the extra room (literally, an extra room). The kids love to demonstrate how the door opens, as if it's their first door experience. They are quite excited for the new bathroom, I think they see it as their own personal playroom bath. By the way... it swings inward.

But if we keep it shut, you're under the illusion that the bathroom is nearly complete, so let's keep it that way for now.


We've also gone ahead and ordered our sink, faucet and drain, and lights, and we're crossing our fingers that it all comes together well.

We went with a vessel sink considering the vanity space is quite narrow, just 29". Instead of hunting for a vanity that would be the perfect width, we're planning to do a custom counter top. And the vessel sink will sit right on top.


We went with the Cheviot Quattro vessel sink in white from Lowes.ca. It was actually an affordable way to go, and we like the character it will bring to our small bath. But we didn't go with the faucet shown, instead with went with a contrasting oil-rubbed bronze bathroom faucet from overstock.com.


Originally, I was planning on a wall mounted faucet like this one, but in case of any faucet leak the drywall would need to be removed to fix it (what a mess). And with moving somewhere in the future, it's safer to go the more traditional route. But we're still really liking the faucet we decided to go with. I think the faucet and sink will be good friends make a great pair.

The lights were tough. We hummed and hawed over whether we should 1. put a light above the mirror, or 2. have two sconces on either side of the mirror (like this), or 3. have two sconces on the walls to the left and right (like this). We liked the idea of a sconce on either side of the mirror, but felt it may looked squished and we'd need to find a very narrow mirror, given the vanity width is only 29". We're always dealing with small spaces, so this kind of dilemma is not new to us. We ended up going with option 3 (which would give us more flexibility down the road with the width of the mirror), and these are the lights we purchased through amazon.ca.


These Kichler lights are brushed nickel with a satin-etched opal glass. Since the lights will be mounted on the side walls surrounding the vanity, it was important that they have a nice profile. So we like the lines and the traditional but modern-esque vibe. It's actually most flattering to put the lights to the sides of the mirror, rather than above, so I'm glad we went this route. And in case you're wondering, the lights will protrude 5" from the wall, so we're not concerned with bumping our head on them, or having them hinder the view of our beautiful selves in the mirror.

So that's where we're at. Whew! Did you stick with me there? Do you see what I'm saying about 'high maintenance'? I'm excited to have all our online orders arrive at our door over the next few days and in some cases, weeks. But now that our choices have been made, the roughing in for these items can be done in the meantime. We were surprised by how much we ordered online.. this is our first time doing that. But we found the prices and options were much better online. How do find ordering online vs. buying in store?